Accept Crypto on Shopify

Accept crypto payments on Shopify in a permissionless and non-custodial way with ATLOS. Follow these three steps to add crypto payments to your Shopify store:
- Add ATLOS payment method
- Add the payment widget to the order page
- Enable Shopify API access
But first, if you haven't done so already, sign up at ATLOS Merchant Panel. The signup is done with only one click once you connect your wallet and takes only a few seconds.
Step 1: add ATLOS payment method
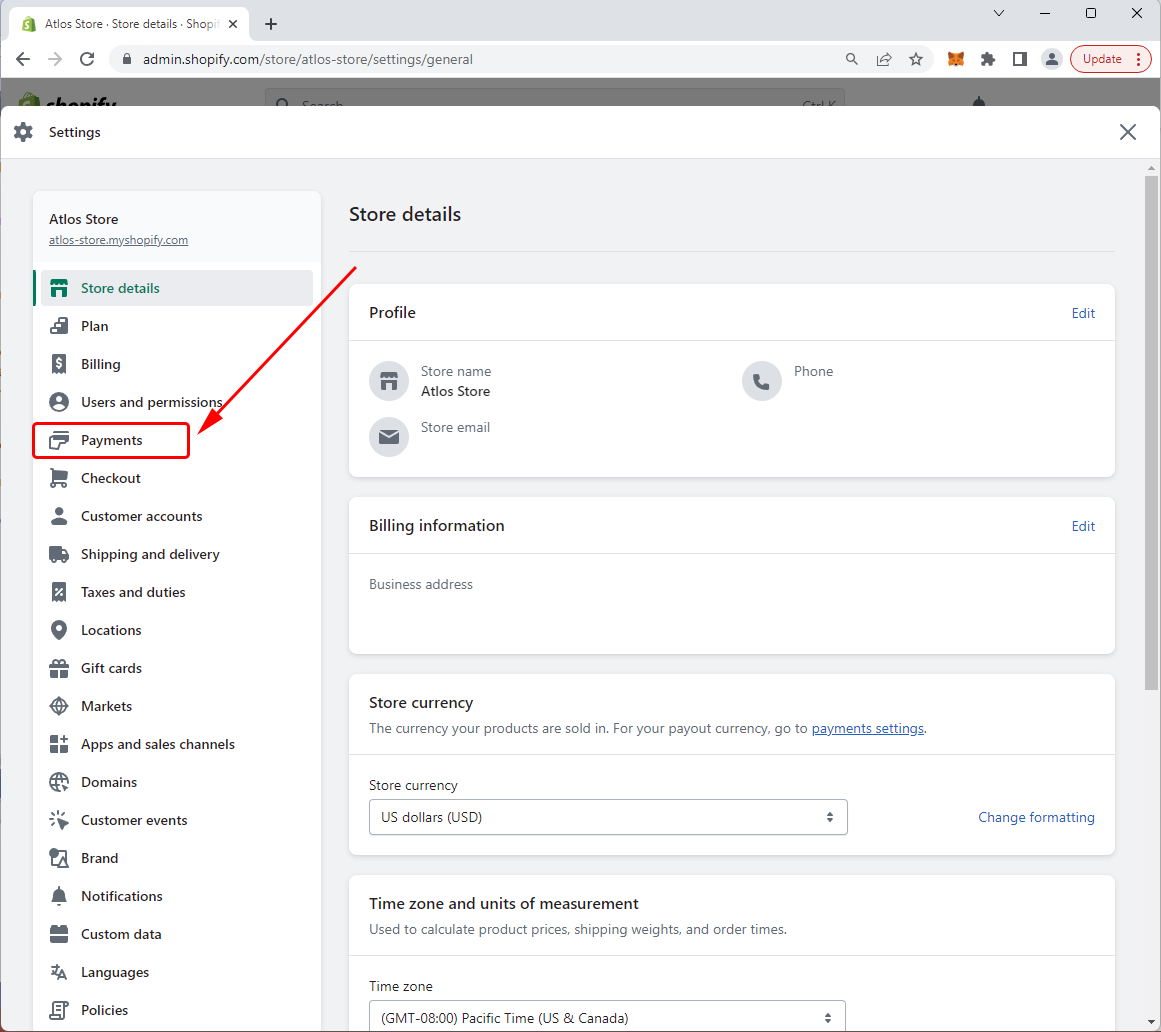
Login to Shopify Admin and select your store on the top left (if you have more than one). Then, click on "Settings" in the bottom left:

Click on "Payments":
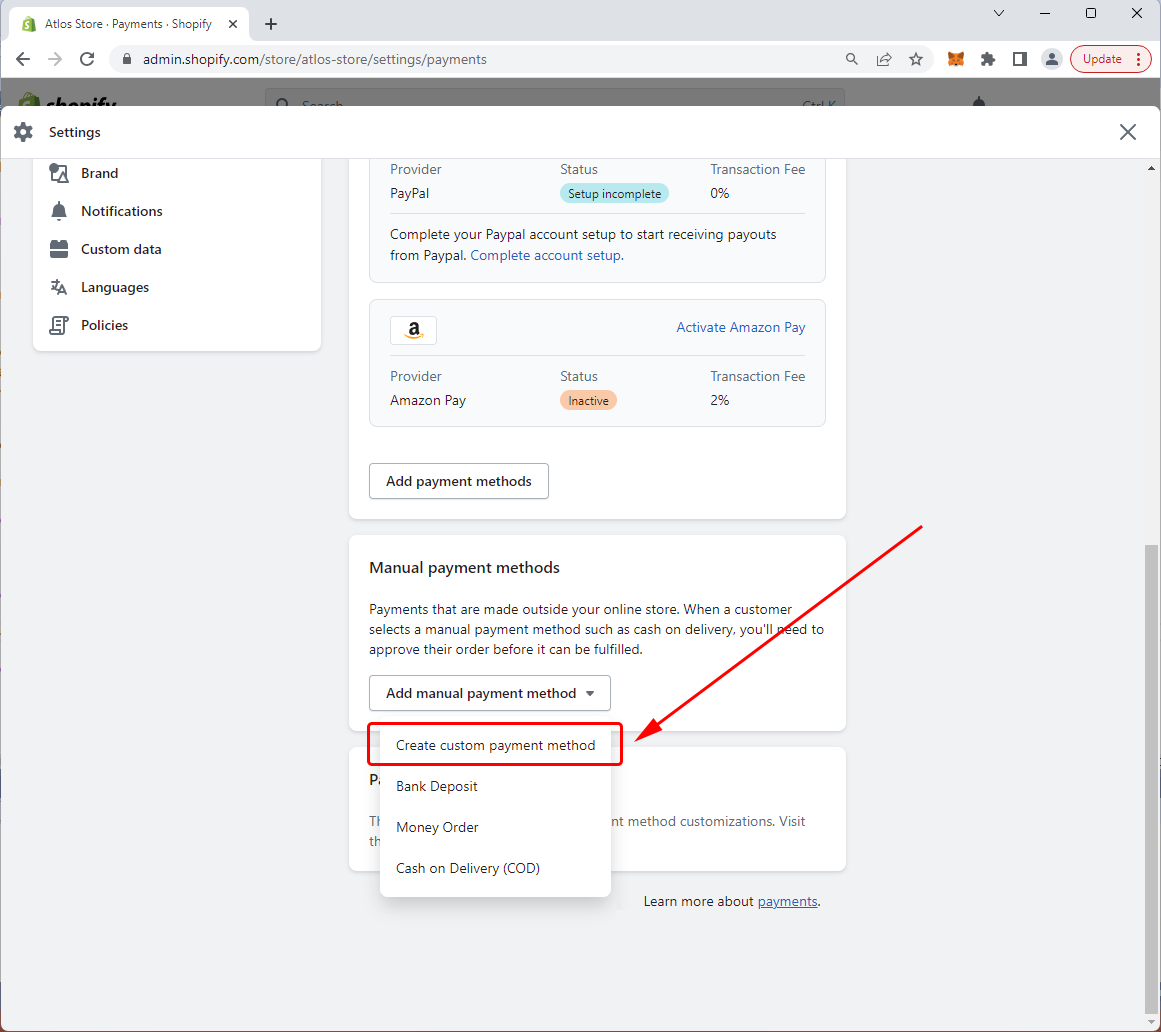
Scroll all the way down and click on "Add manual payment method". In the dropdown, select "Create custom payment method":
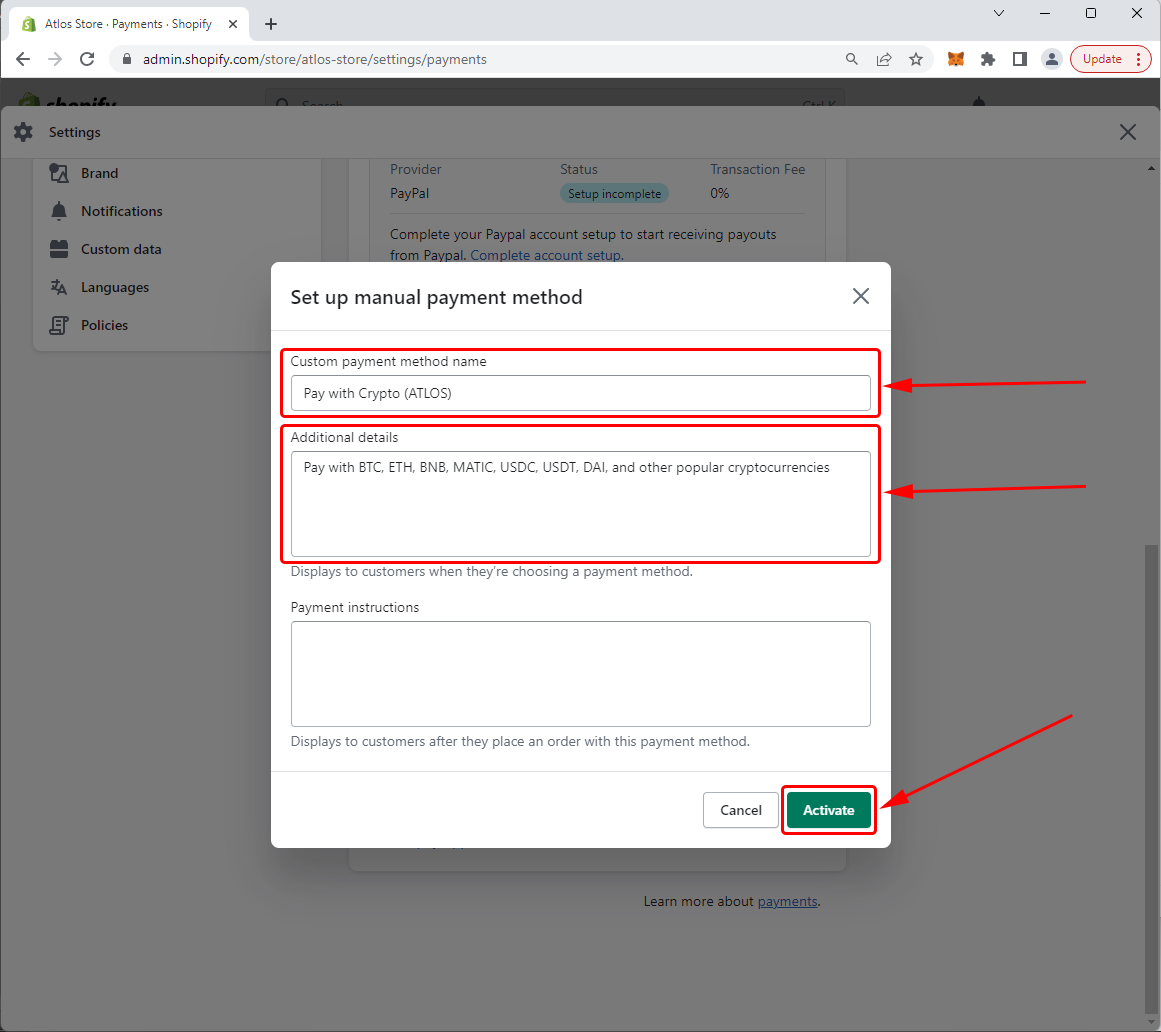
In "Custom payment method name" enter:
Pay with Crypto (ATLOS)
In "Additional details" enter:
Pay with BTC, ETH, BNB, MATIC, USDC, USDT, DAI, and other popular cryptocurrencies
Note that you may enter different text in these fields. Just make sure that the word "atlos" appears in the payment method name.
Click on "Activate":
Congratulations. You have added a new payment method. However, users cannot pay with it yet, until you add the payment widget to the Order Page.
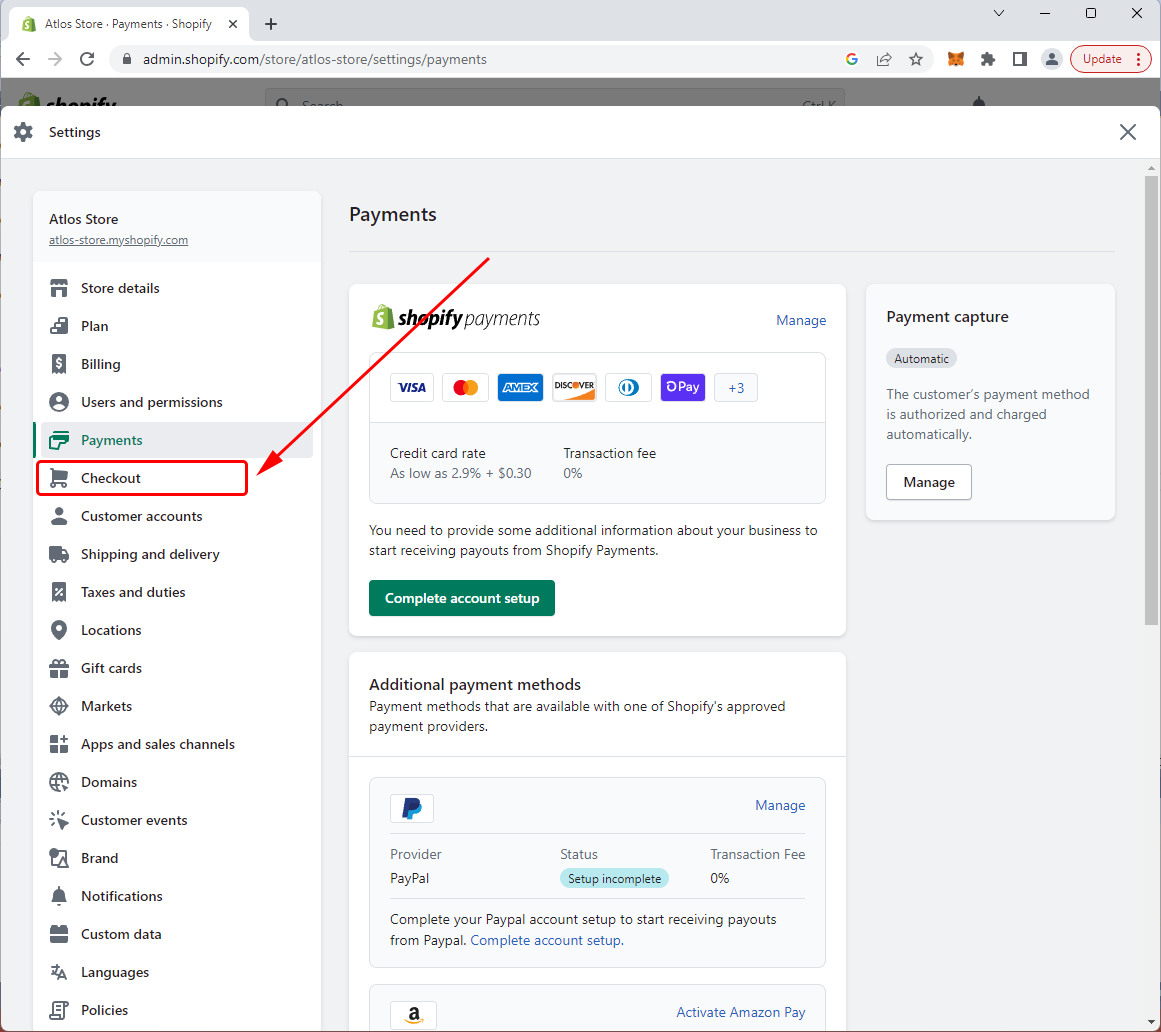
Step 2: add the payment widget
Continue from the point you left off in step 1. Click on "Checkout":
Scroll all the way down and find the field "Additional scripts". You will need to copy the order page script in there:
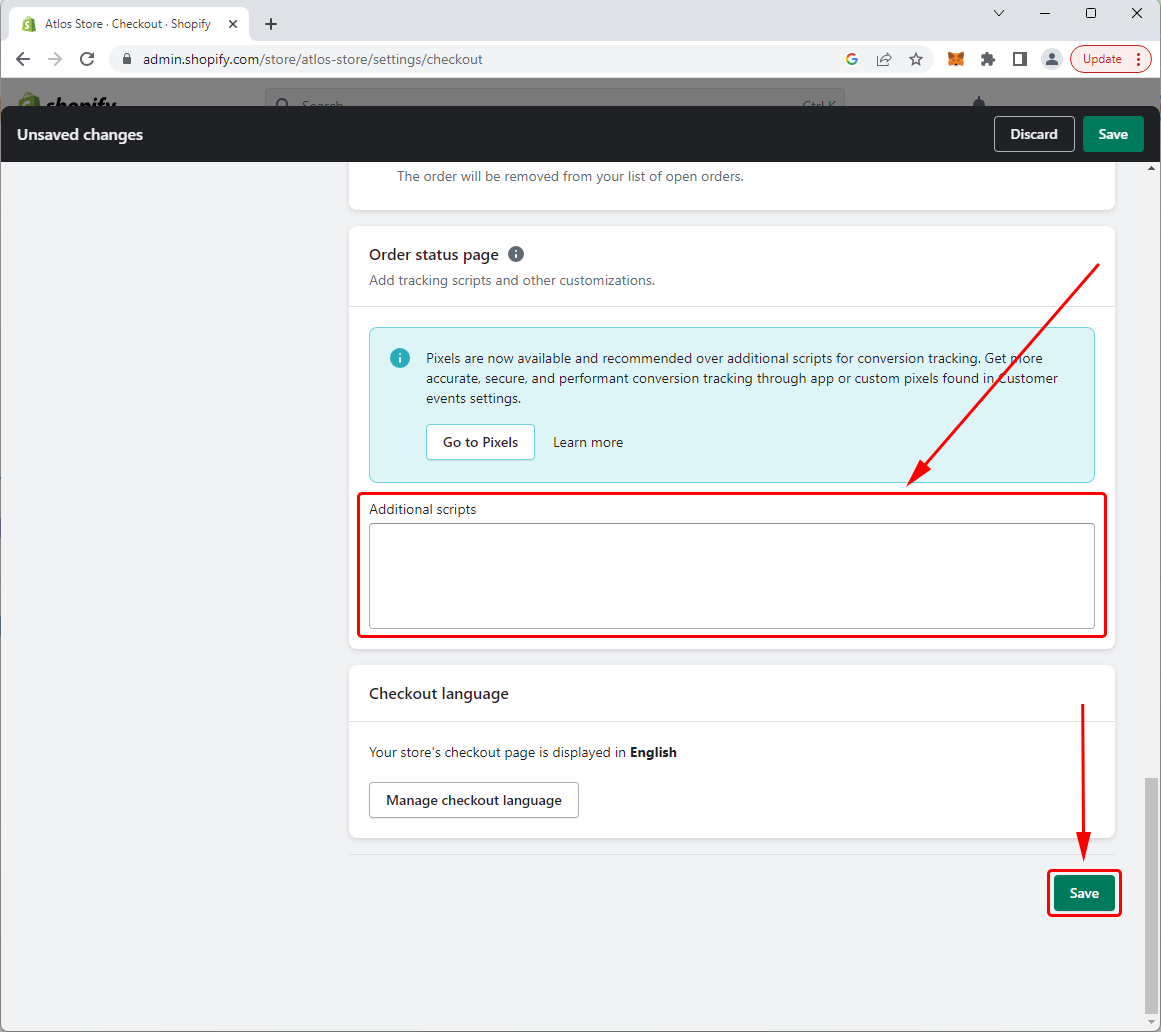
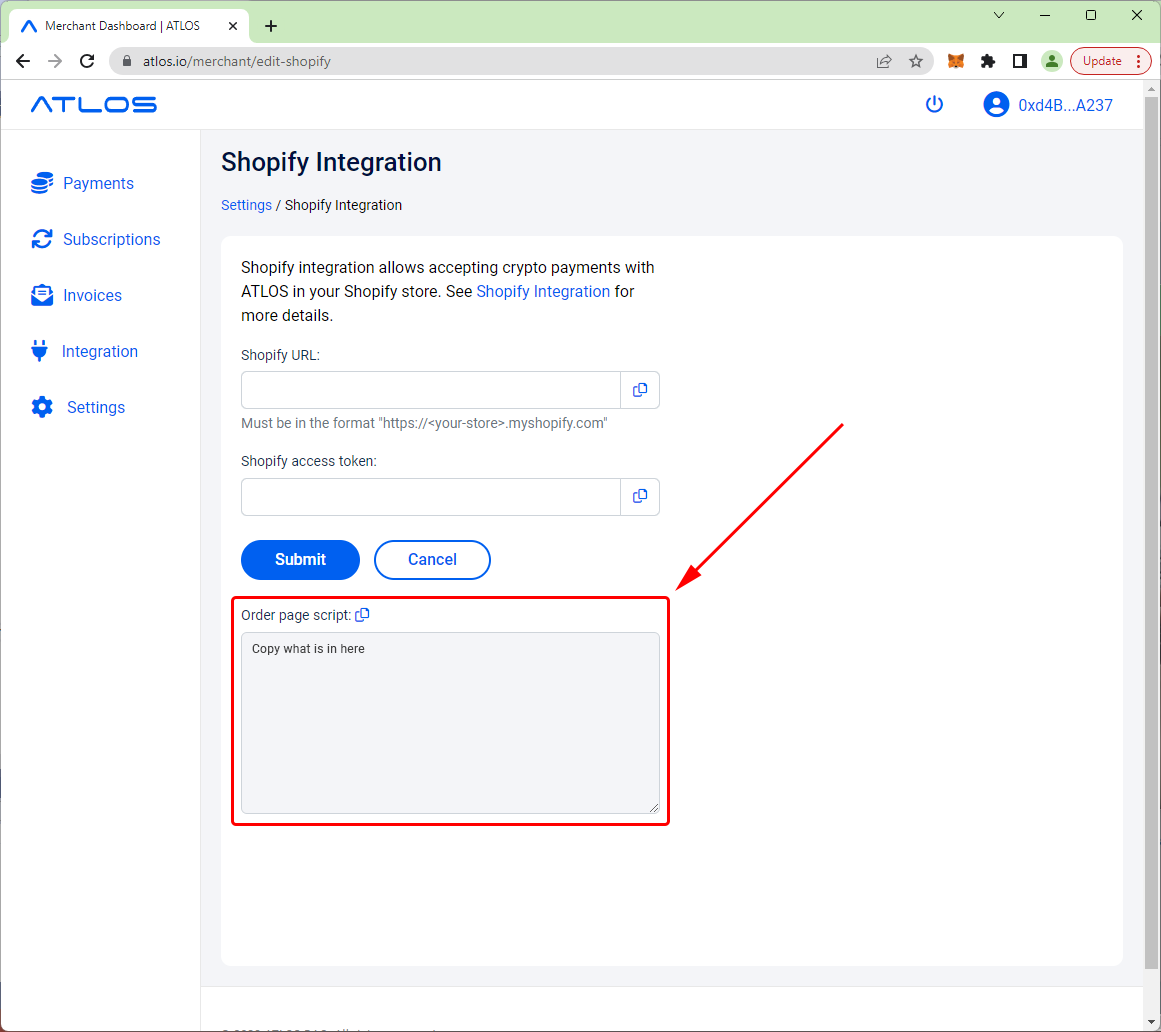
ATLOS automatically generates that script for you. To get the script, login to the ATLOS Merchant Panel. Click on "Integration" on the left. Scroll down to "Shopify integration", and click on the "Shopify integration" link. The Shopify Integration page will open. Scroll down to "Order page script" and click on the Copy icon. Leave this page open. You will need it in step 3.
Now, go back to the Shopify Admin page and paste the script into the "Additional scripts" field (see above). Click "Save" when done.
Congratulations. Now your users will have the option to pay with crypto. However, one piece is still missing. When the payment is made, it will not be automatically marked as paid in Shopify. To do that, you will also need to enable Shopify API access.
Step 3: enable Shopify API access
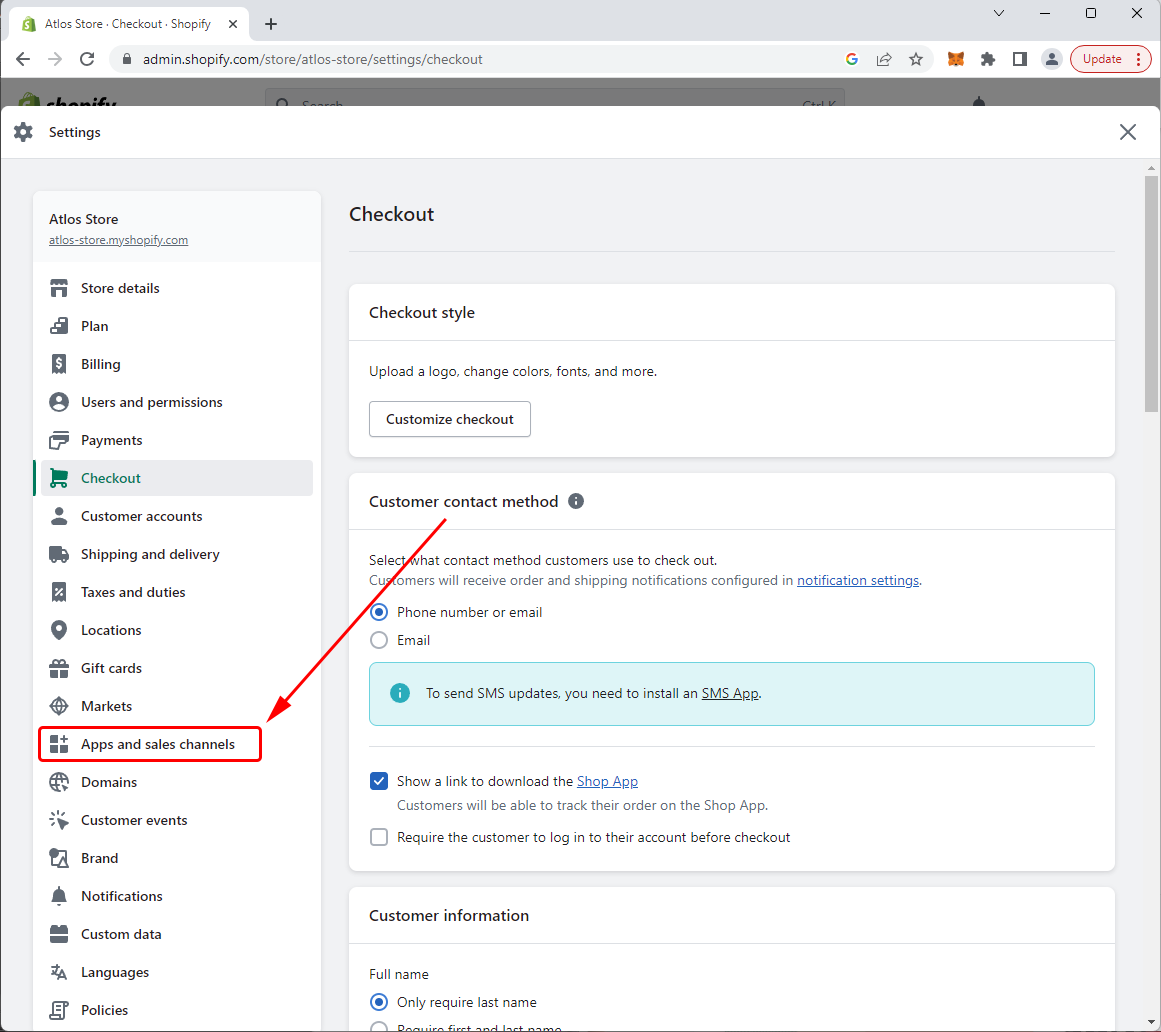
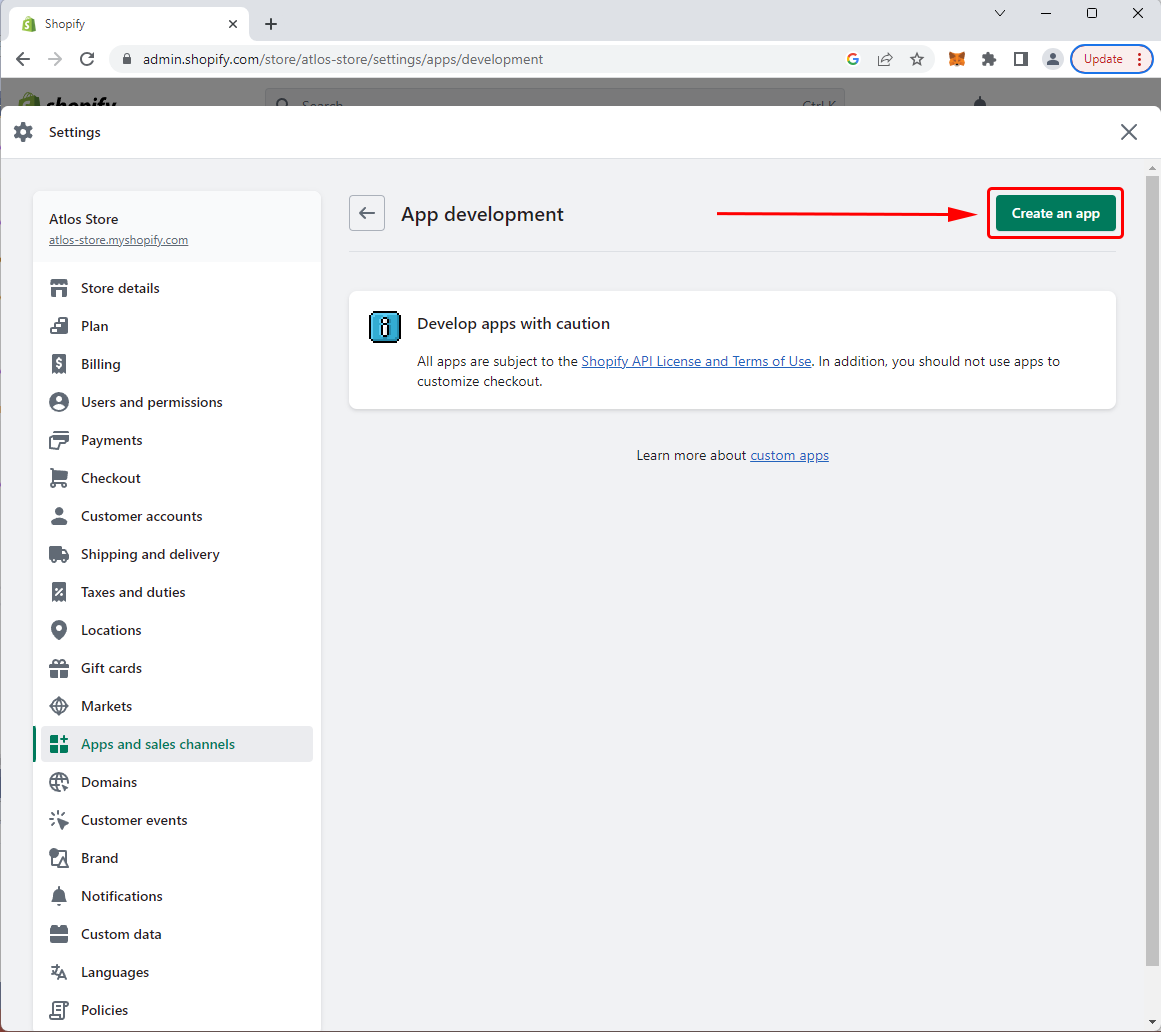
In order to get API access to Shopify you will need to create a Shopify app. Continue from the point you left off in step 2. Scroll up and click on "Apps and sales channels":
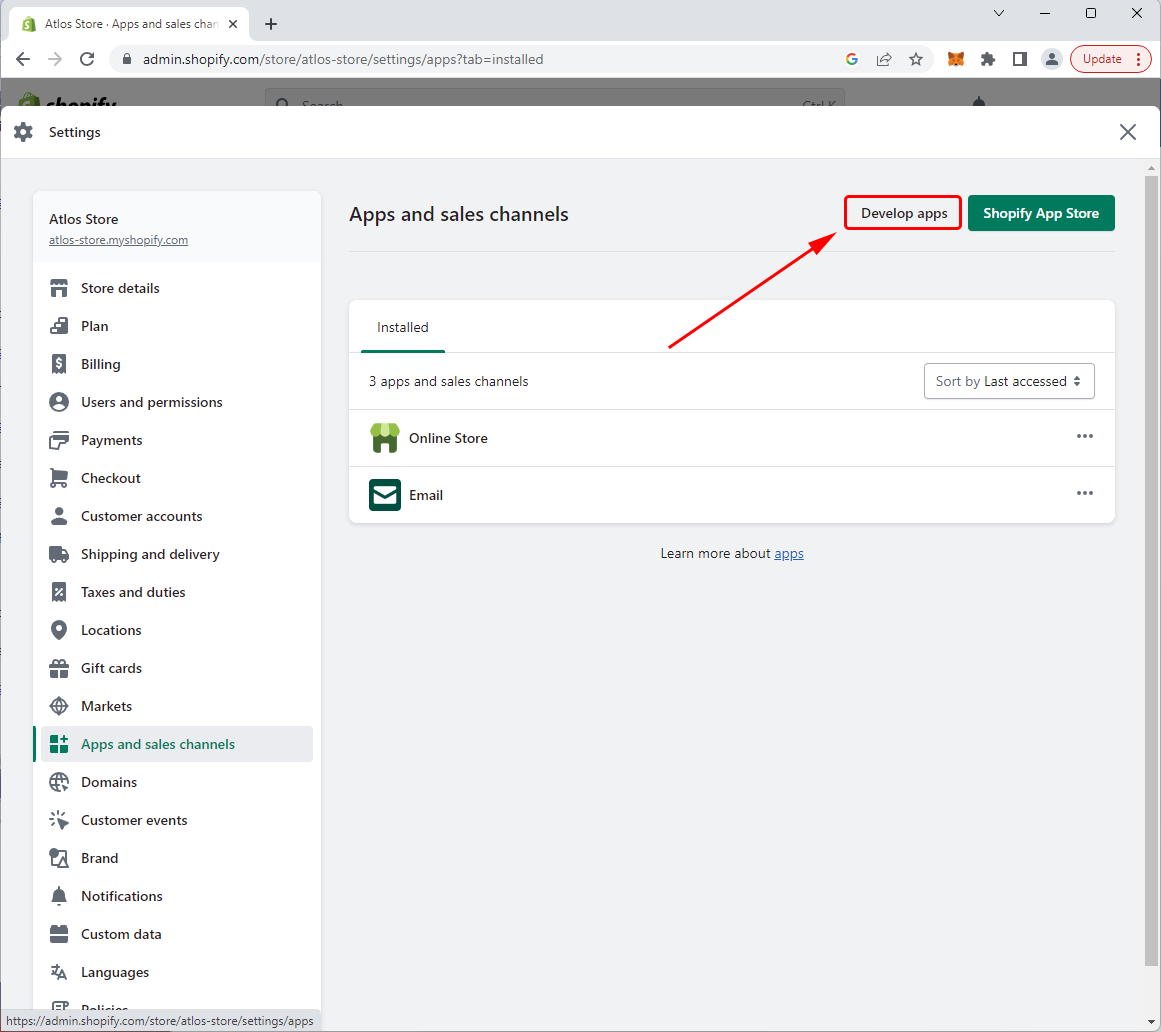
Click on "Develop apps".
If this is your first app, you will also need to click "Allow custom app development", read the warnings, and click "Allow custom app development" again.
Click "Create an app":
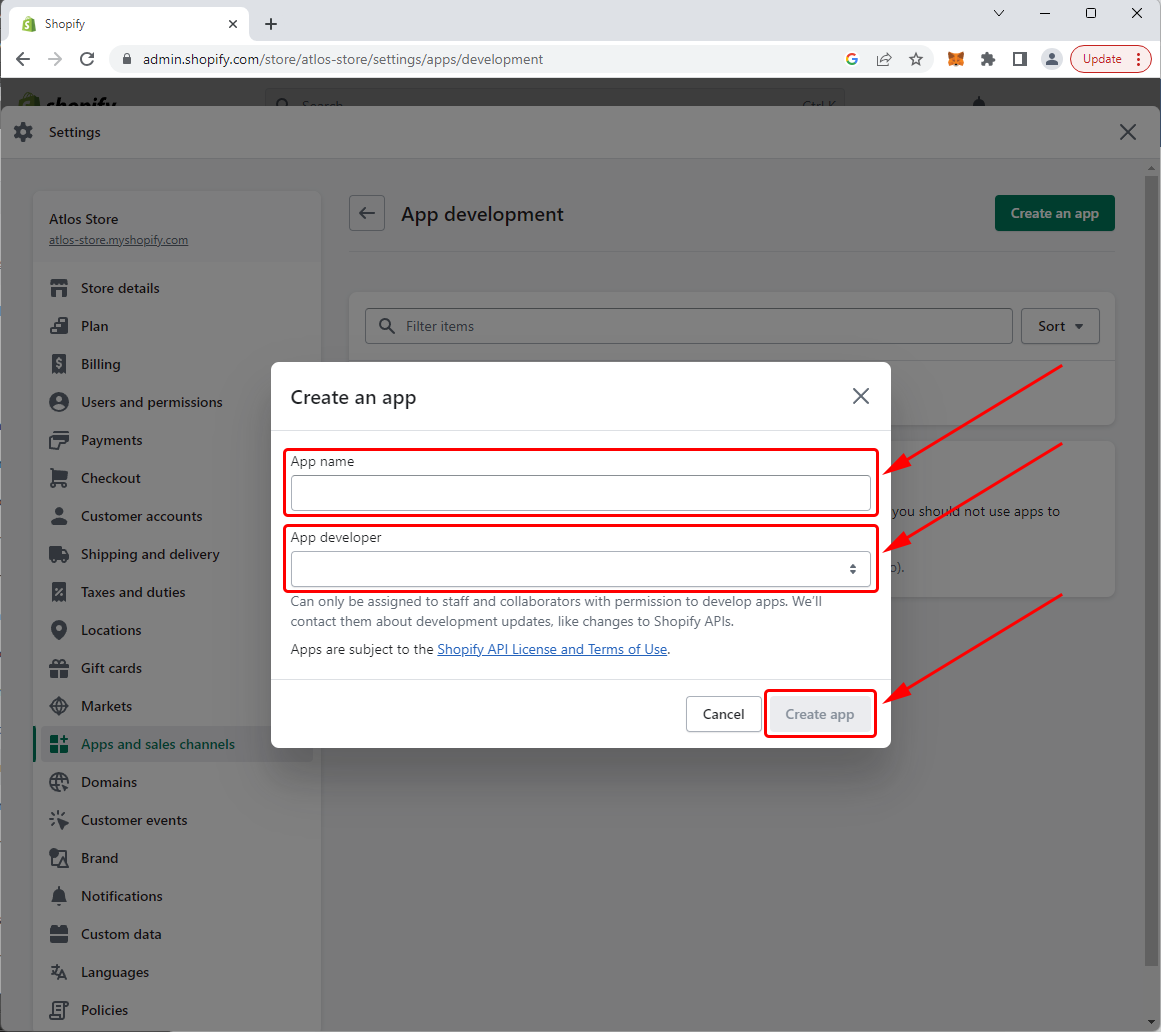
Type "ATLOS Payments" in the "App name" and select any user with app development permissions in "App developer". Click "Create app" when done:
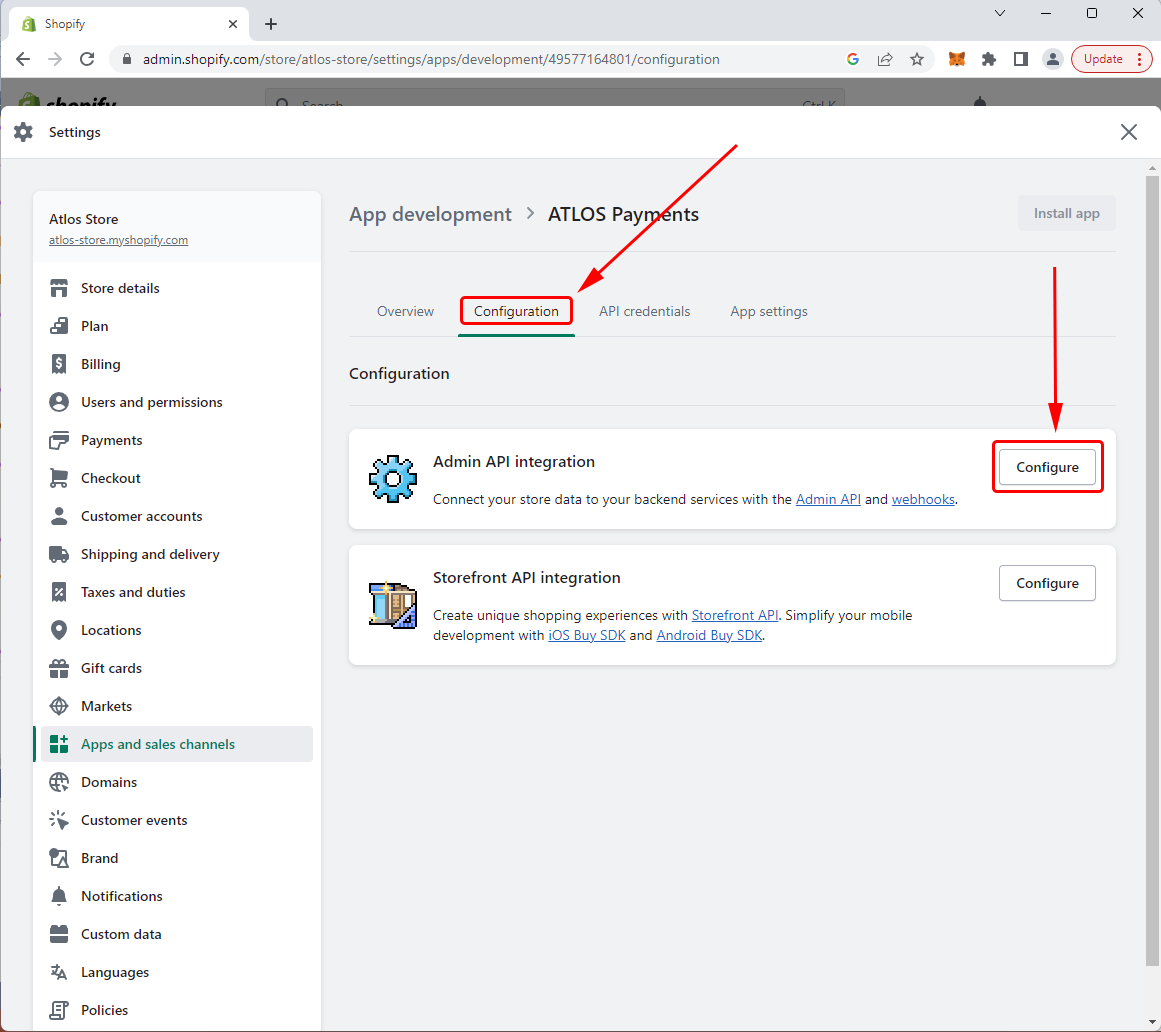
The app is now created. Click "Configuration" and then click "Configure":
Scroll down to find the "Orders" section and check the boxes next to "write_orders" and "read_orders". Then click "Save":
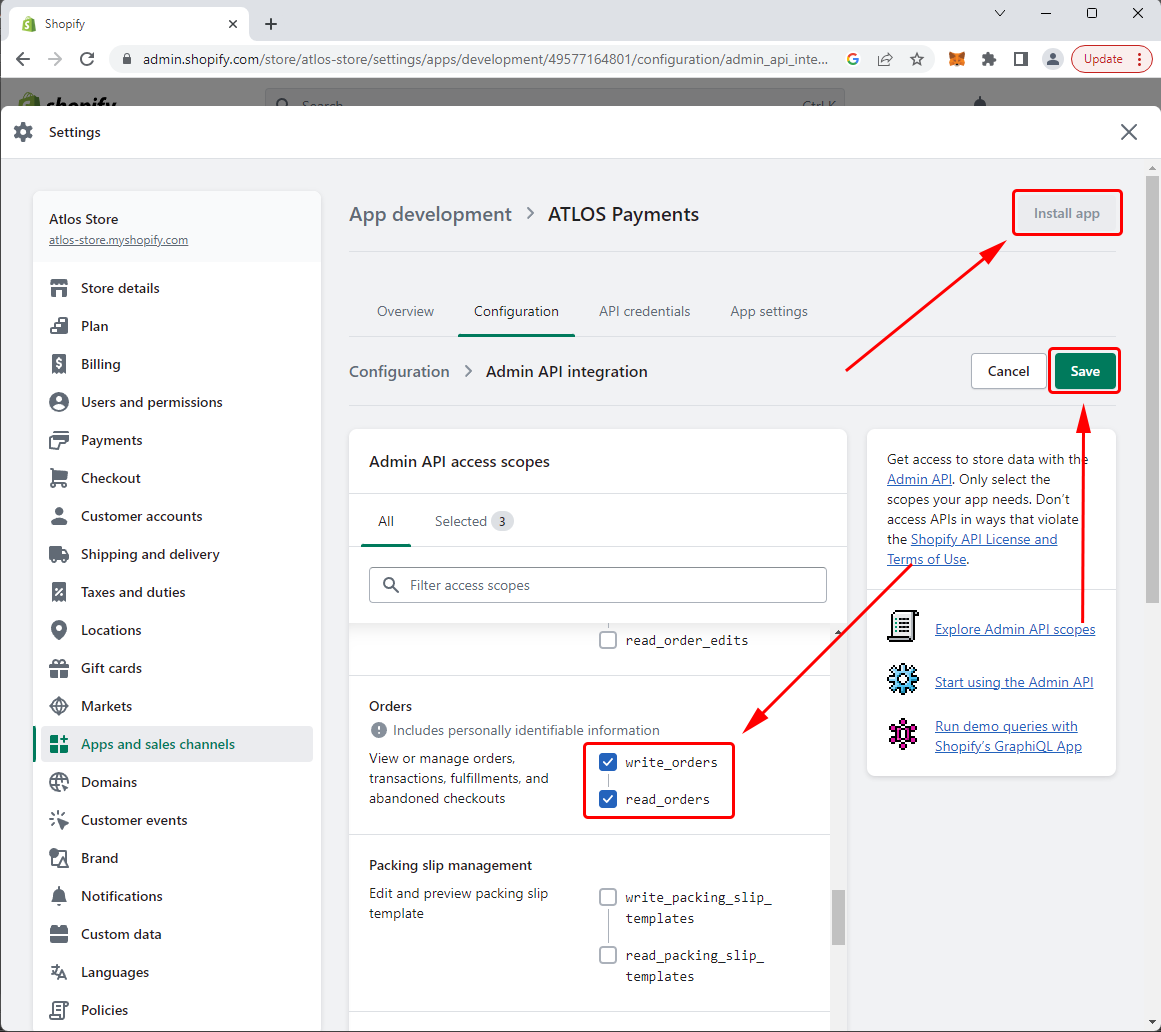
Click "Install app". Read the warning and click "Install".
Now the app is created, configured, and installed. All what is left is to get the app's API credentials and enter them into ATLOS.
Click "API credentials", then click "Reveal token once". Save this token somewhere, as you will not be able to see it on this page again.
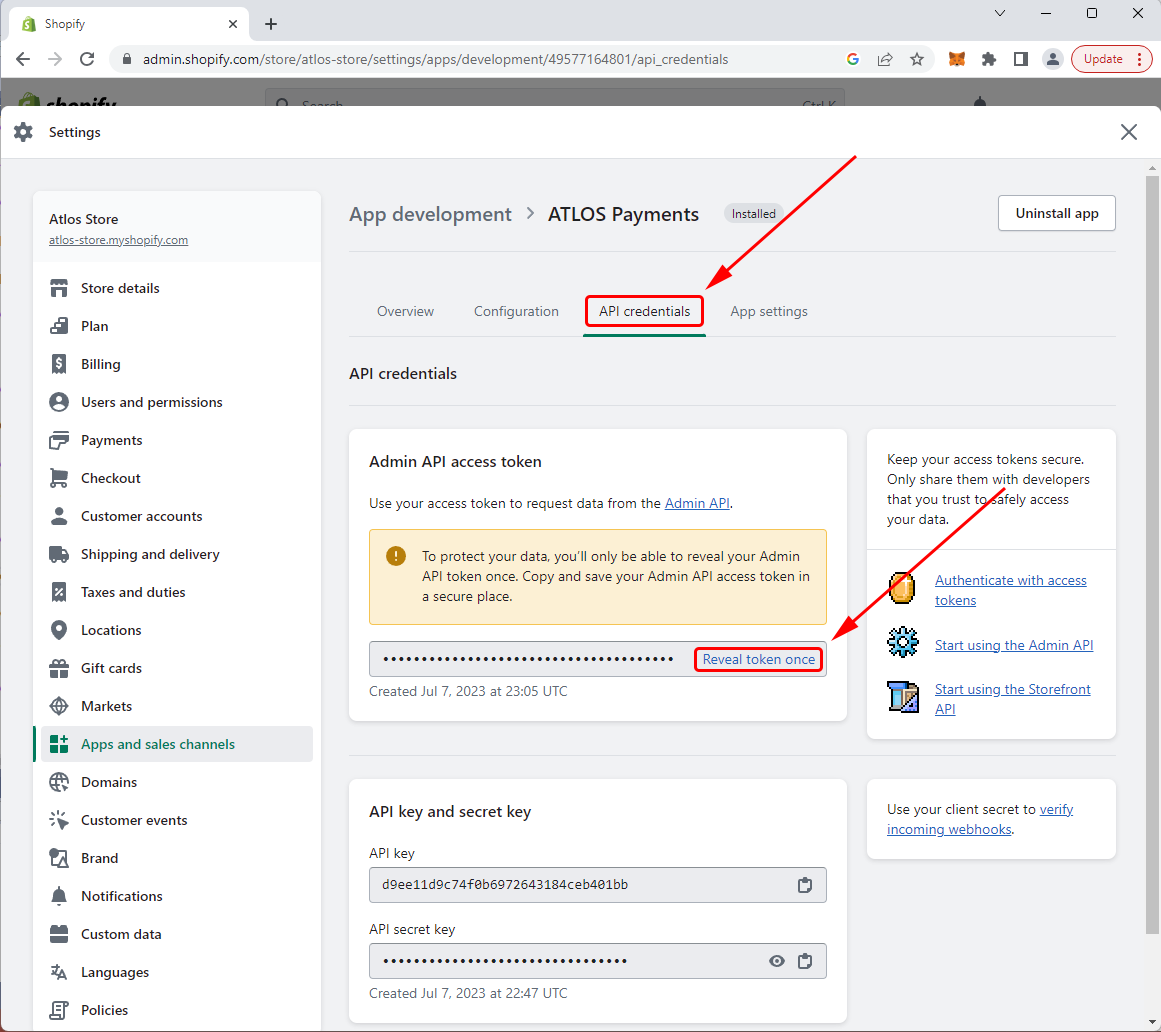
Go back to the Shopify Integration page in ATLOS Merchant Panel (see step 2). Paste the Shopify API access token in the "Shopify access token" field.
Also, enter your Shopify store URL in the "Shopify URL" field. Make sure it is in the format "https://<your-store>.myshopify.com". Click "Submit".

You are done! Now, users can pay with crypto on your Shopify store and the order will be marked as paid automatically in Shopify.
Check the Integration
Check your ATLOS and Shopify integration by placing a test order. Select any product, add it to the shopping cart, and click "Checkout". Fill in the customer details and click on "Continue to payment".
On the payment screen, you should be able to see the ATLOS payment method:

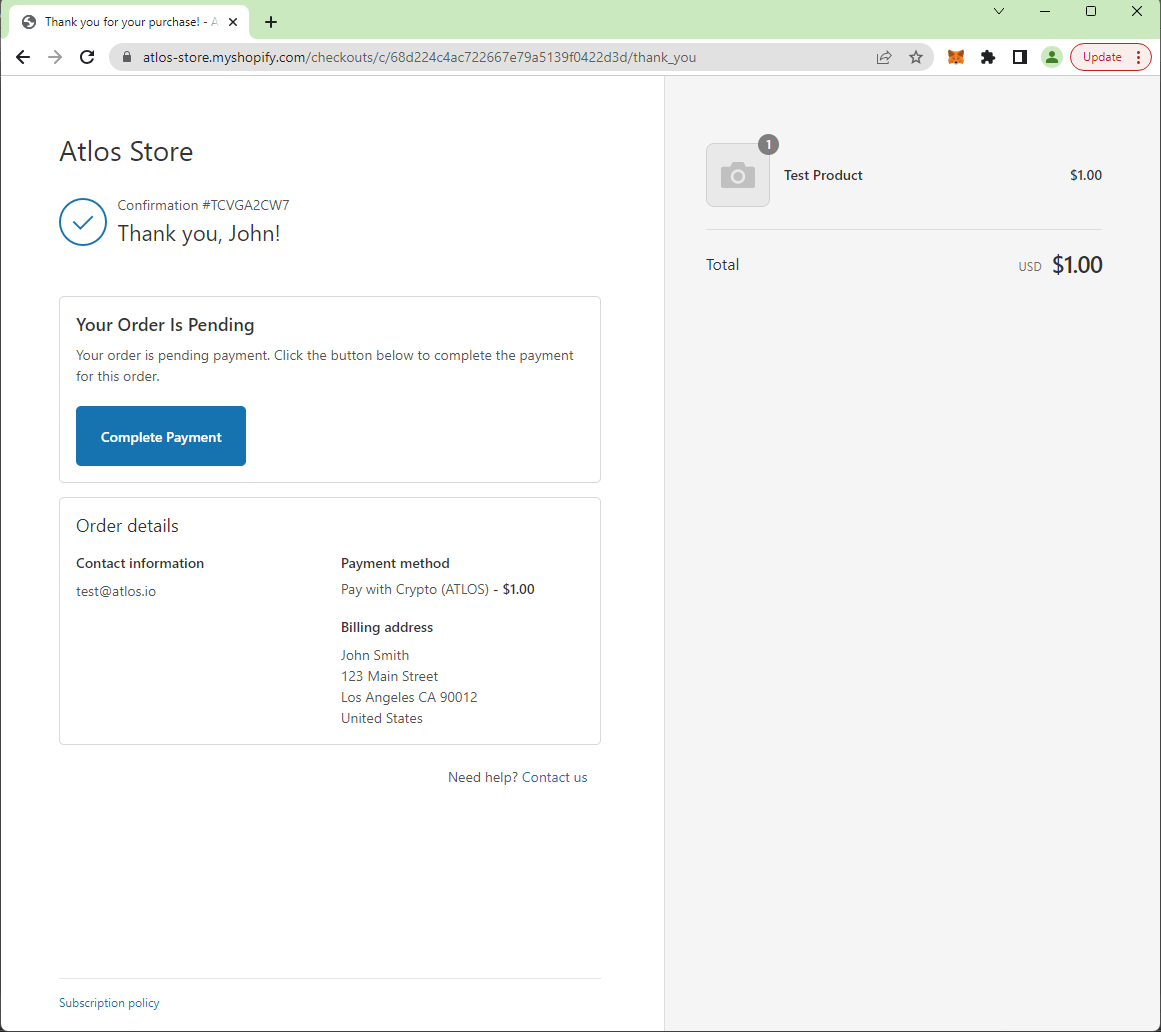
Click "Complete order". The next page should allow you to complete the payment in crypto:
Click "Complete Payment". The ATLOS payment widget should appear:
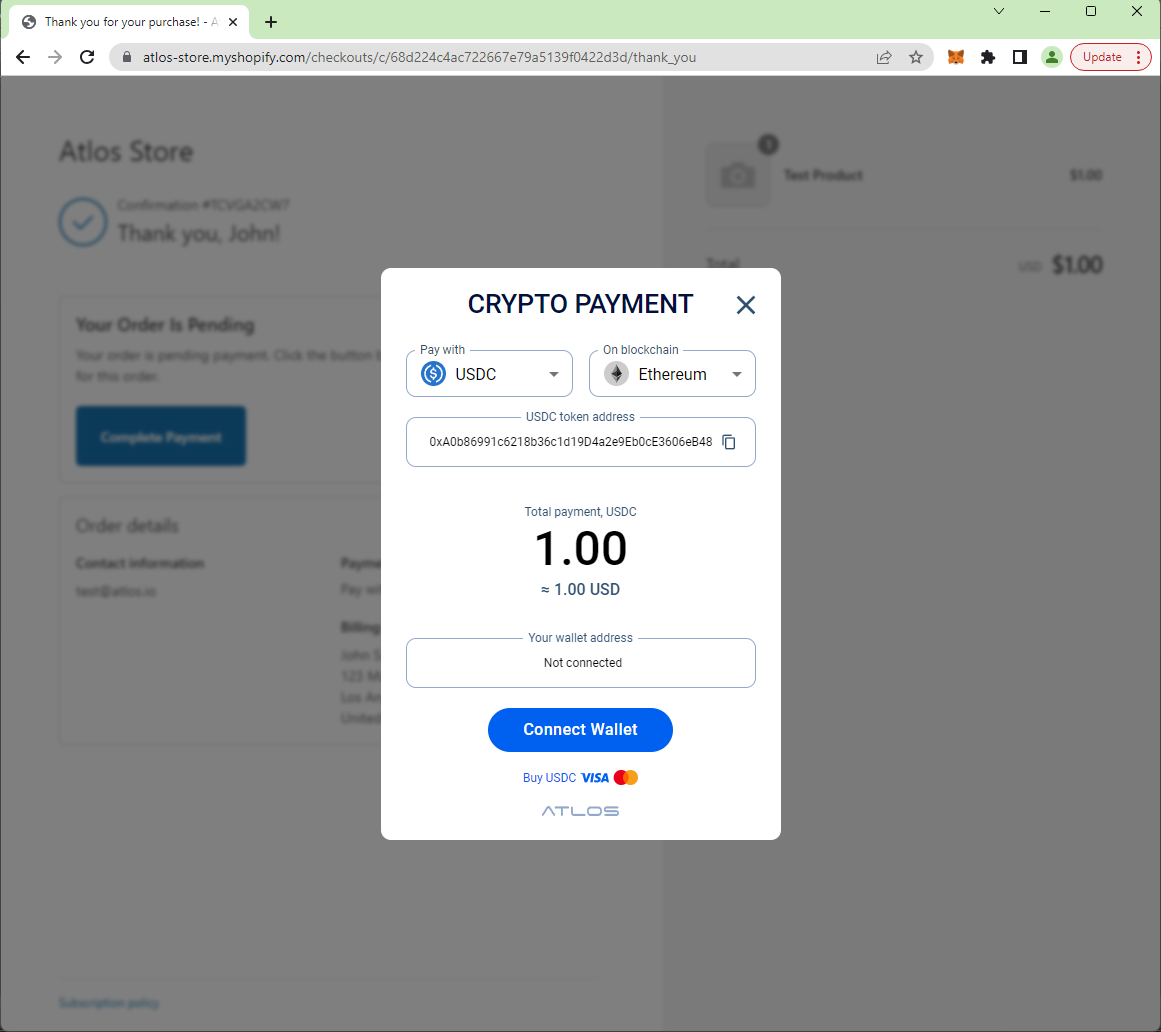
Connect the wallet and complete the payment. Yes, you get the confetti at the end!
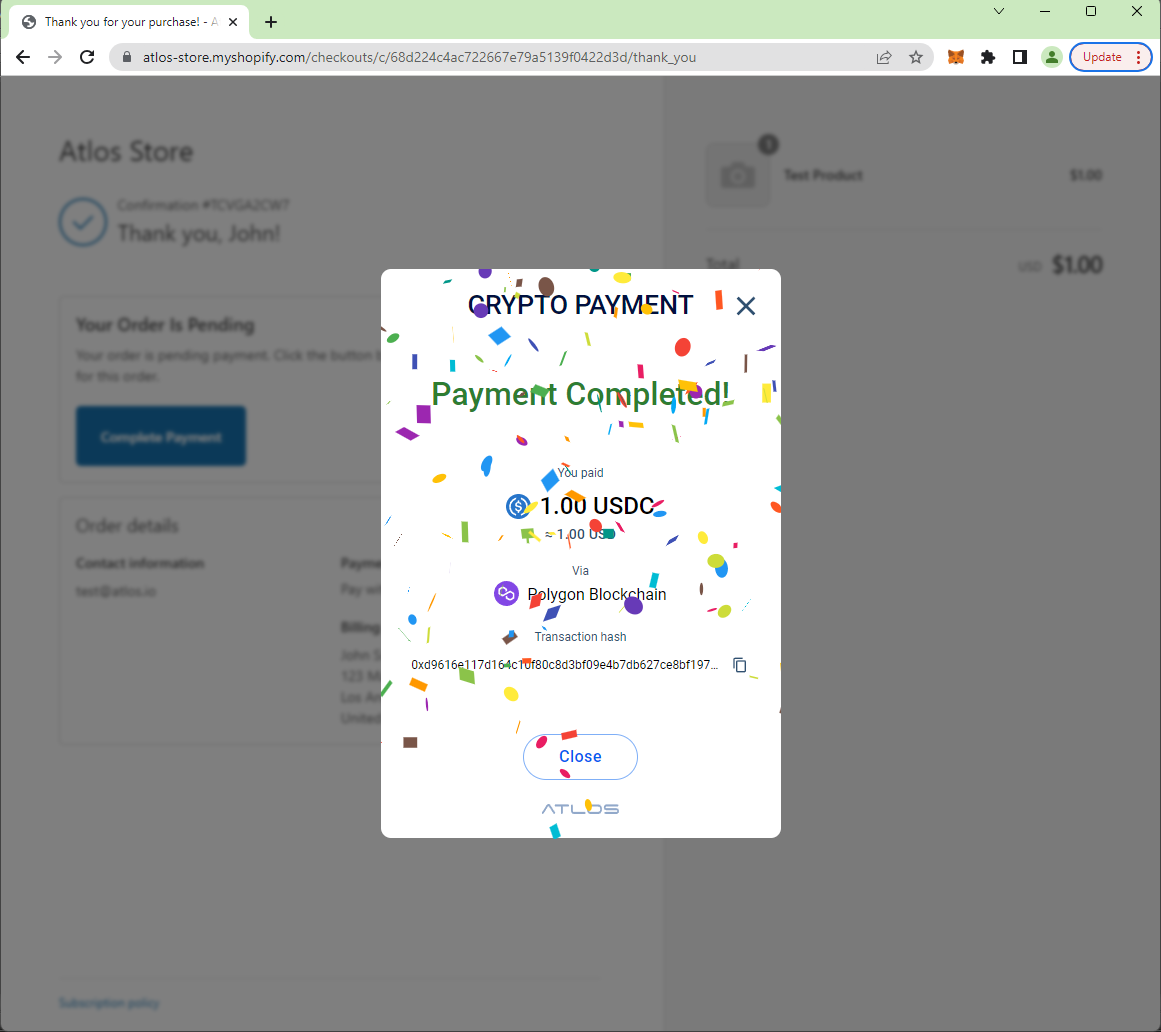
Click "Close". The order is now displayed as confirmed in Shopify. You can also verify its payment status in Shopify Admin.

That's it! If you saw the screens above, it means you integrated ATLOS with Shopify correctly.
Subscription Payments
At this time, Shopify does not allow paying for subscriptions with custom payment methods. Contact Shopify and ask them to allow ATLOS to be a Shopify payment partner to enable merchants receiving recurring payments in crypto!
Support
If you run into any issues with your Shopify integration, please contact us at .